 I came to Scrivener the way I come to a lot of things: Oh. Fun. Want.
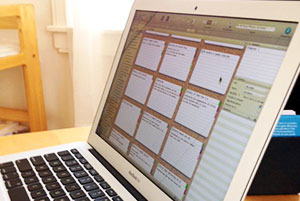
When I wandered into the tea shop to meet my Novel Incubator mentee, Kelly Robertson, she had her laptop open and I saw a fun corkboard with lots of colored tabs. Tell me more, I said. The gist: Scrivener made her think, oh. It looks so organized. It makes me feel organized. Want.
If there’s a time for writer organization, it’s National Novel Writing Month, also known as NaNoWriMo, which begins November 1. There are many fantastic features in Scrivener, such as the satisfying ding! that notifies you when you’ve reached your word count for the day and the snazzy character profile board that makes you feel like you’re working a big FBI sting in a back room somewhere. But if you’re just getting started, it can be overwhelming. Here’s my quick and dirty guide to getting your Scrivener on during NaNoWriMo or any other time you find yourself up against a deadline.
Scrivener offers a free, extended trial version during NaNoWriMo that won’t expire until December 7, with discounts for participants. Once you’ve downloaded the software and are ready to go, come back here… Ready? Okay!
Targets
NaNoWriMo comes with built-in targets: 50k words by November 30. Not easy, especially if you have, oh, a life outside of writing. I don’t do well with sitting down to write at a specific time. If I just went by time, I’d get maybe 100 words written. There are too many distractions. That’s why word count is a good motivator for me and others.
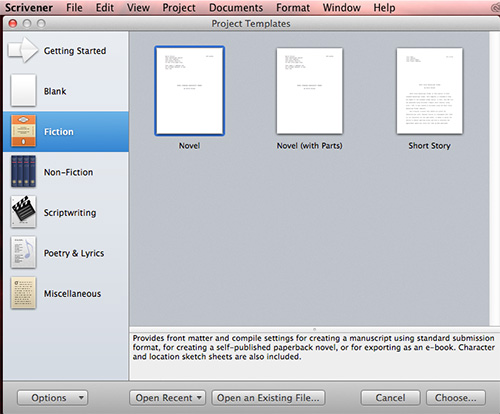
Go to File > New Project. This will bring up a dialogue box. Presumably, you’re writing fiction so pick Fiction > Novel (to keep things simple). Note: These are instructions for Mac users, but PC users can follow the same general steps.
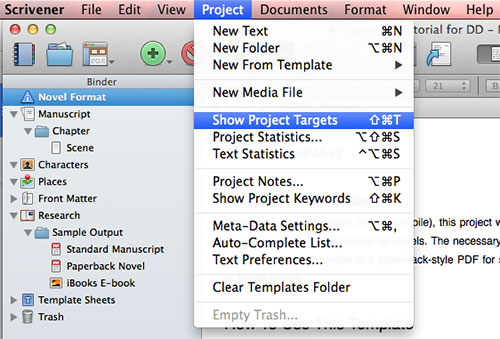
Now it’s time to set your Manuscript Target (word count) and Session Target (deadline). Go to Project > Show Project Targets:
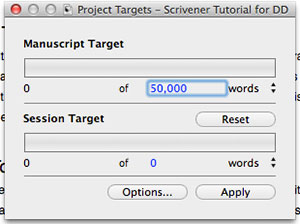
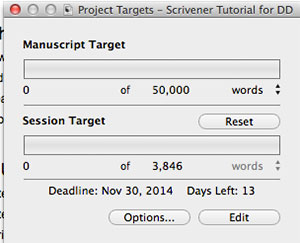
You’ll see the following dialogue box. In the Manuscript Target section, click the Edit button to change the word count from zero to the NaNoWriMo target of 50k words. Then, click Apply (the Edit button text will change to Apply after you enter your word count).

After you’ve entered your word count, click the Options… button below the Session Target section to add your deadline:
This will bring up a new dialogue box. The first two checkboxes will be pre-checked. You won’t be compiling anything at this stage, so you can leave them as is. In the Draft Target section, click the Deadline checkbox. Change the deadline to 11/30. Then, click the Automatically calculate from draft deadline checkbox and pick your writing days under the Session Target section. Decide whether or not you want to allow writing on the day of your deadline and if you want notifications. When you’re finished, click OK.

Based on the writing days you chose, Scrivener will automatically calculate the number of words that you need to hit per writing day (the Session Target) to meet your goal of 50k by November 30.*
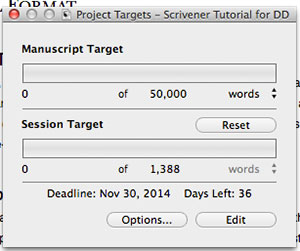
1,388 words a day? Totally doable.
You can’t commit to writing every day or during the work week? Fear not, Weekend Warriors. In this scenario, update your writing days to only Saturday and Sunday to see how many words you need to write per session:
3,846 words a day? Ouch. But still doable.
The good news is that every day you’re able to write more than you anticipated or on days that you hadn’t planned to, your Session Target is recalculated. So check Project Targets every time you open Scrivener to see how you’re tracking against your goal. For example, here’s the status for my current work in progress with a target of 80k words, writing six days a week, with a November 30 deadline:
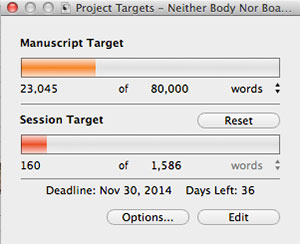
Color-coded progress is oh so satisfying.
The great thing about Project Targets is that it helps you break down a seemingly impossible goal into more tolerable bite-sized chunks. Once you’ve set your targets, you can start writing. Or you can start outlining.
Outlines
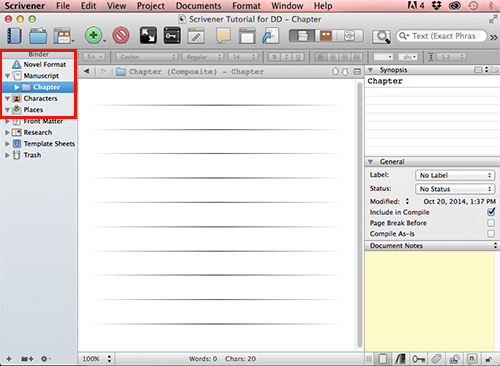
Whether you enjoy writing story outlines or not, Scrivener can help you either plan out your story or make things much less messy come revision time. Begin by closing the Project Targets dialogue box we’ve been updating. Then, click Scene in the lefthand Binder window.
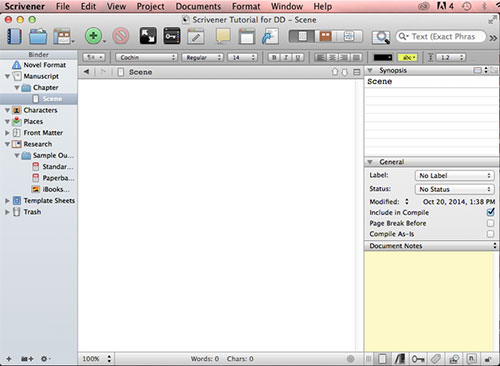
The dreaded blank page.
Technically, you could start writing. Because NaNoWriMo is all about hitting word counts by a certain goal, this would not be a bad idea. But if you’re like me, you need a bit more structure than that.
I participated in NaNoWriMo early in its inception. The final word count of that novel: 1494 words. Pathetic. I was in the middle of another novel that I’d become sick of and thought that I would try something new. That didn’t go so well because I started with a blank page and only a glimmer of an idea. Years later, before my latest novel in progress, I decided to research and brainstorm the basic plot before I began typing the first sentence.
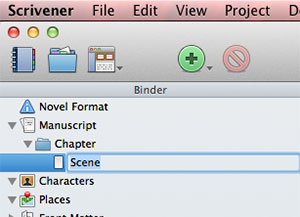
To build an outline, add a new scene. Click the green circle with the Plus sign in it. I recommend labeling your scenes for later, when you need to go back and figure out where you put what. To do this, click the text Scene. The text will become editable so you can type over it.
Then, go wild.
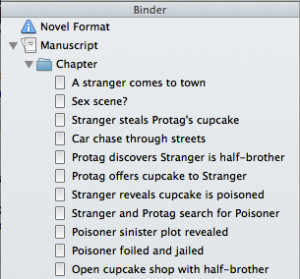
The next great American novel.
In a handful of scenes, I have my basic plot. Come November 1, I’ll be tapping my fingers on the keyboard instead of the desk, waiting for the muse to inspire me.
You can also drag and drop scenes to new locations as you go:
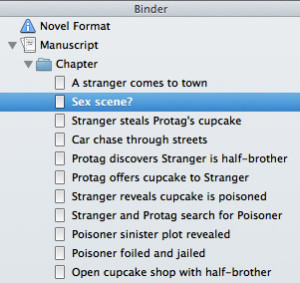
Totally different story when you cut & paste, no?
And if you decide that one scene doesn’t work, you can also delete it. To delete a scene, select it and then click the red circle with a line through it.
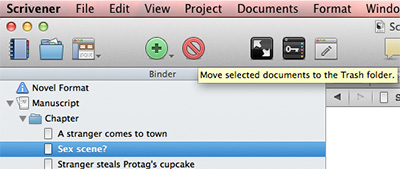
Rinse and repeat as often as you like.
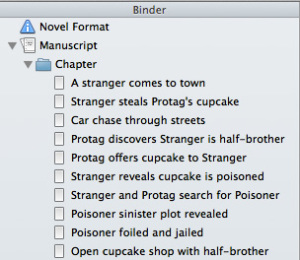
Better.
Focus
There are all sorts of fun things you can do in Scrivener. But I won’t go into detail here because the whole point of NaNoWriMo is to focus on the writing. But here are a couple of ways I use Scrivener to help me during the hours that I need to be writing instead of screwing around on the interwebs.
Speaking of focus, you’ll only need to pay attention to the red rectangle part of the Scrivener screen for the rest of this post:
Create character profiles
If you have time, I encourage you to fill out the character profiles before you begin writing in earnest. It’s helpful to know your character before you write so that you’ll know how they’ll respond in certain situations and to keep your character consistent throughout the draft.
Because I’m a visual person (and a pop culture junkie), I often cheat by finding photos of actors and models to represent my characters. I don’t use the images literally, but as a general guide to the tone and feel of a character. It’s supposed to be a cheat, so find an image quickly. Then, when you need to remind yourself of physical features or how you envisioned them, you can go to the Characters section of Scrivener.
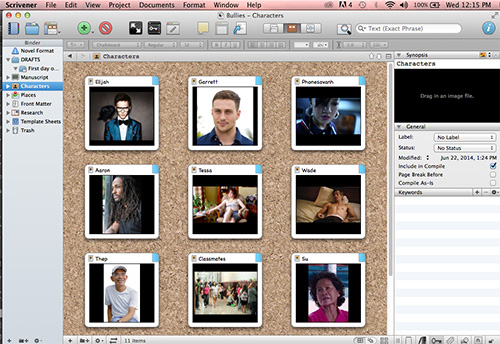
Warning: This can be a fun, but not productive time suck.
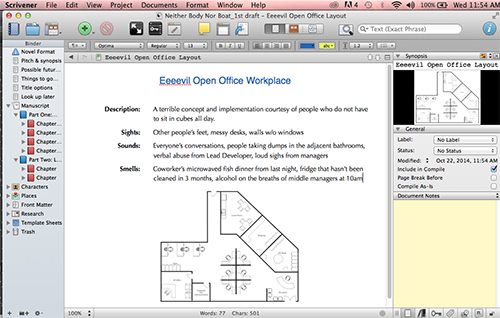
Create Settings
Here’s another cheat, this time for setting: Floor plans. A quick Google search will produce many options. For example, in my current novel in progress, much of my characters’ time is spent in a workplace, but sometimes I stop to wonder if I placed the kitchen over here or there.
In the Places section in the Binder, drag and drop the floor plan image into Scrivener. Much like the character profiles, you can add little notes to yourself as reminders.
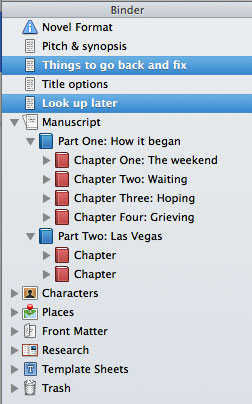
Notes
There are several places within Scrivener to take notes. I prefer to add them in the Binder above the Manuscript section because my notes tend to get lost in the detail. This way, I stay off the internets but don’t lose track of what I need to do during revision.
In Conclusion
The hardest part about writing a novel is finishing a novel. Scrivener provides features that help writers meet goals and also has the added — more important in the long-run — bonus of creating writing habits that are sustainable.
Oh, and here’s one last step:
![]()
For a much more in-depth guide to Scrivener, check out Gwen Hernandez’s website and books on the topic. Scrivener also provides an interactive tutorial, which can be accessed within the program: File > New Project > Interactive Tutorial.
* The majority of these screenshots were generated 11 days before November 1, so these calculations should be used as a general guide, not actuals.